MIRA LUX MULTIFLEX 635 B / 635 BR PUSH BUTTON XTEND / PREMIUM
KITS / TURBINES
Steel Kit
107-7900
Ceramic Kit
907-1716
Steel Turbine
107-2322
Ceramic Turbine
907-1714
ADDITIONAL PARTS
TOOLS
Blank Bur
907-1066
Impeller
107-8249
Autochuck
107-2781
Head Cap
907-0107
Cap Wrench
107-5389
EZ Push Button Protector
907-1065
Insert B
907-1082
Insert C
907-1083
Insert 7
907-1080
BEFORE YOU BEGIN
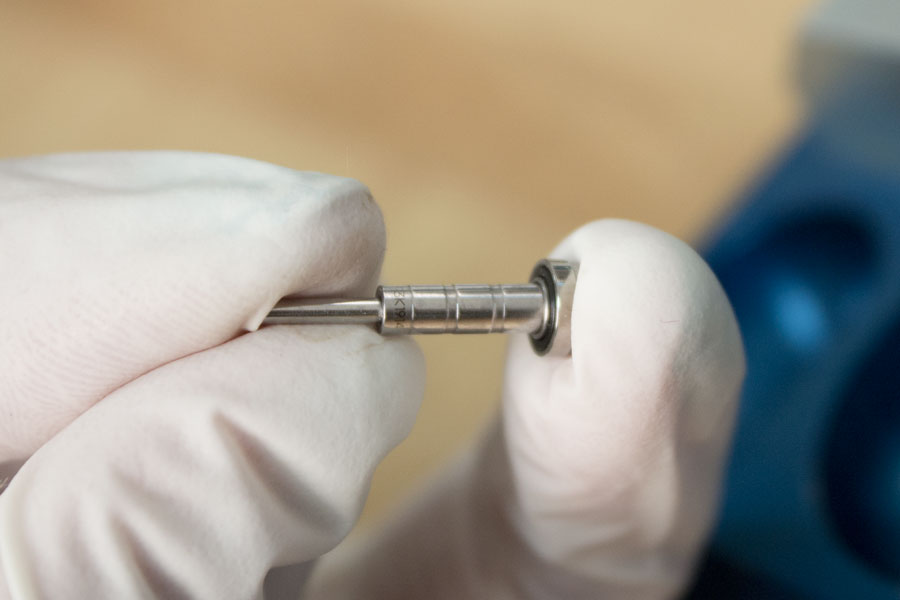
After reviewing the training video and STEP-by-STEP instruction sheet, install the blank bur provided with your EZ Press. Tap the bur against the counter and try to pull it out using your fingers. If bur pulls out call ProScore for replacement spindle/collet.
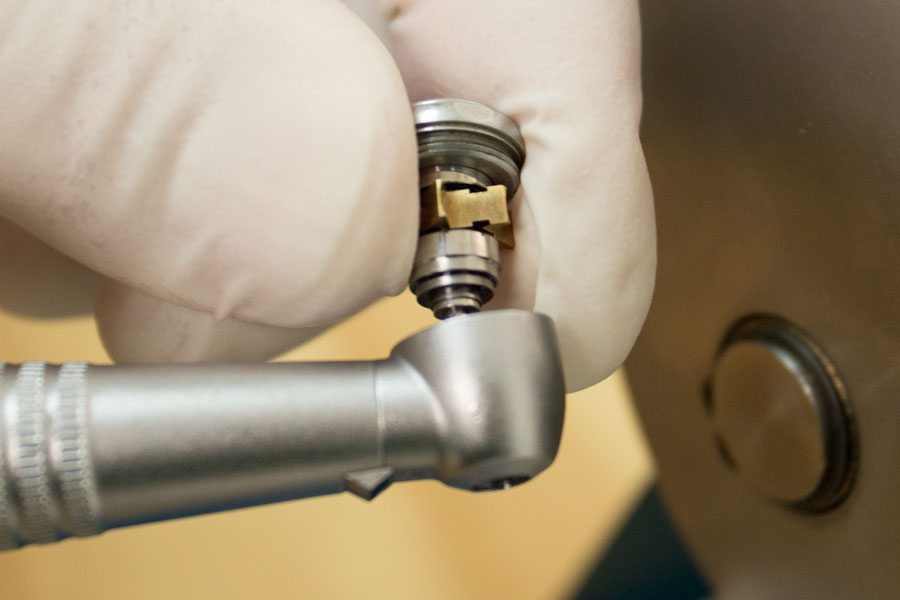
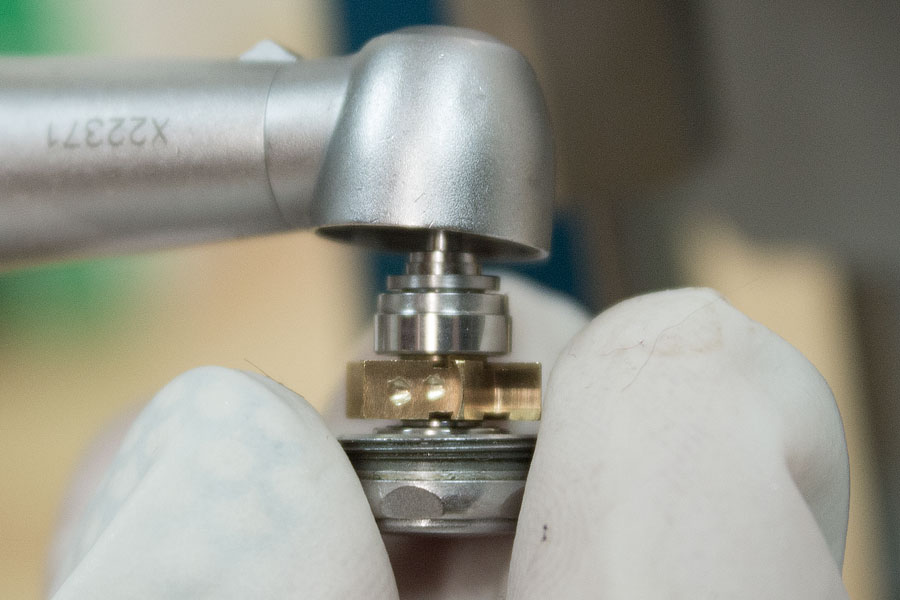
STEP 1
Loosen head cap using appropriate cap wrench and remove turbine. If head cap and turbine come out together, separate and set head cap aside.
Inspect the head and head cap for debris and clean thoroughly using a cotton swab and handpiece cleaner. If any debris is overlooked the turbine may not fit back into either the head cap or head and may bind.
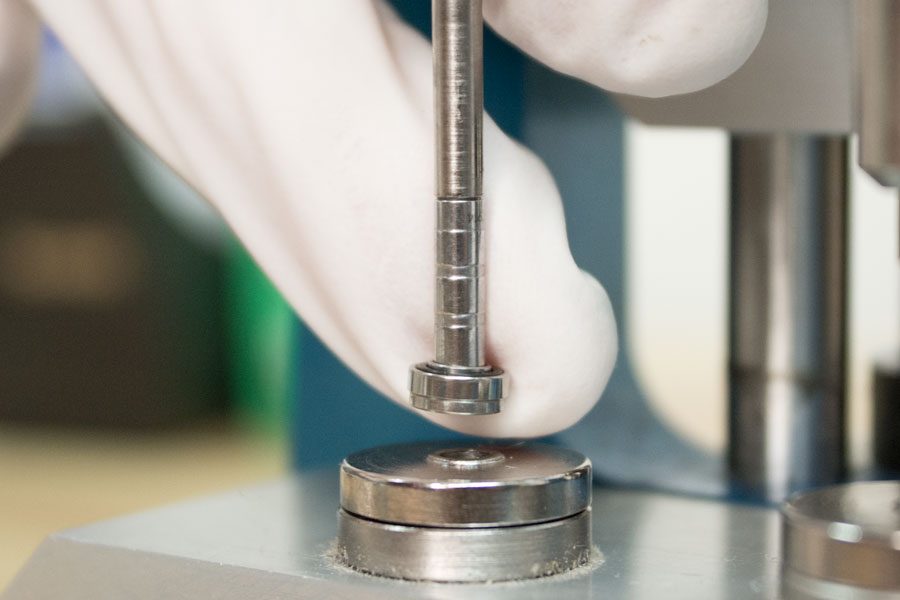
Place Insert C under the spindle ram and Insert 7 under the bearing ram.
STEP 2
Pick up the turbine and feed the blank bur up into the Spindle Ram. While holding the turbine in place slowly pull down on the handle until the rear bearing goes down into the hole in Insert C and the impeller is lying flat on its surface.
Once the turbine is aligned pull down firmly on the handle. The spindle with the rear bearing still attached will be pressed out and fall into the tray below. The impeller, old front bearing and slinger will remain sitting on Insert C.
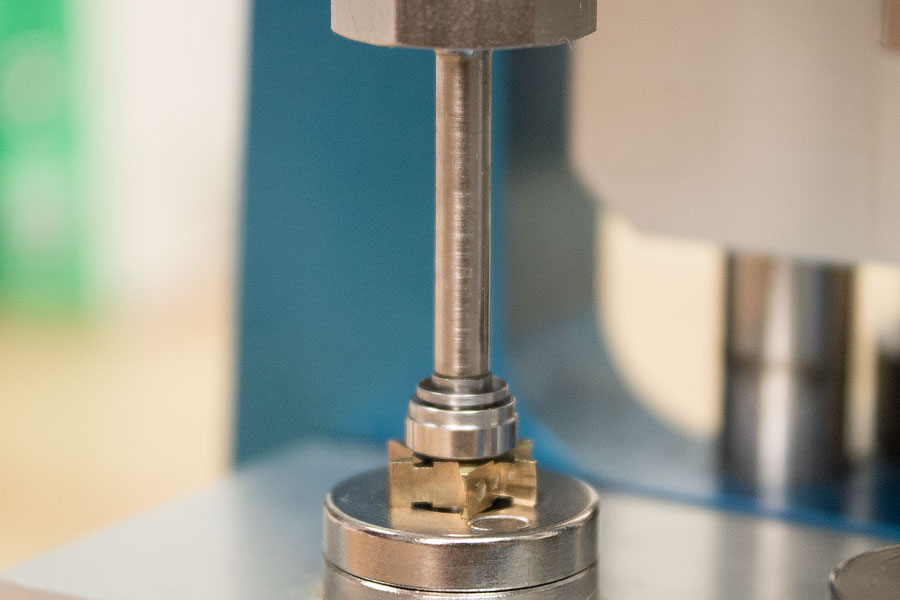
STEP 3
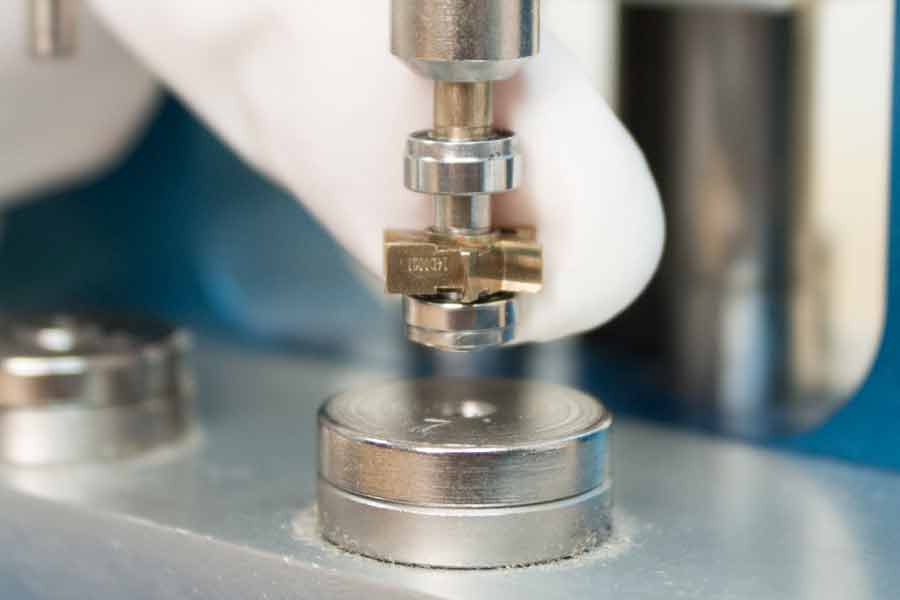
Remove Insert C along with the parts that were pressed off and install Insert B on the left side. Retrieve your spindle with rear bearing and place in the center of Insert B with the bur going down through the hole in the center. The rear bearing will catch on the insert and prevent the spindle from falling through.
Feed the skinny end up of the EZ Push Button Protector into the spindle ram on the left side of the press and hold in place.
Verify all parts are aligned. Pull down or tap on the handle firmly to push the rear bearing off of the spindle. The spindle and protector will fall down into the tray below. Now the turbine is completely disassembled
STEP 4
Discard old bearings and slinger. Inspect impeller and autochuck for any visible damage. If any are found contact ProScore for a replacement.
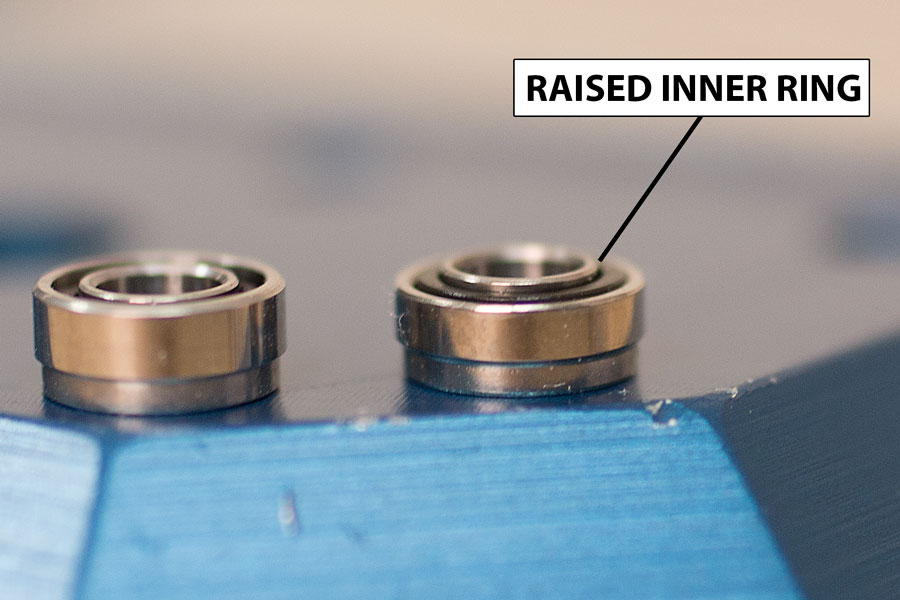
STEP 5
Open your new rebuild kit and compare the two bearings. Place both on the counter with the dark sides up and take a close look. The rear bearing has a raised inner ring.
STEP 6
Pick up rear bearing and try to get it started on the rear of the spindle with your fingers with the dark side facing the bur end. If the bearing is loose enough to push all of the way on with just your fingers use EZ Tight to hold it on.
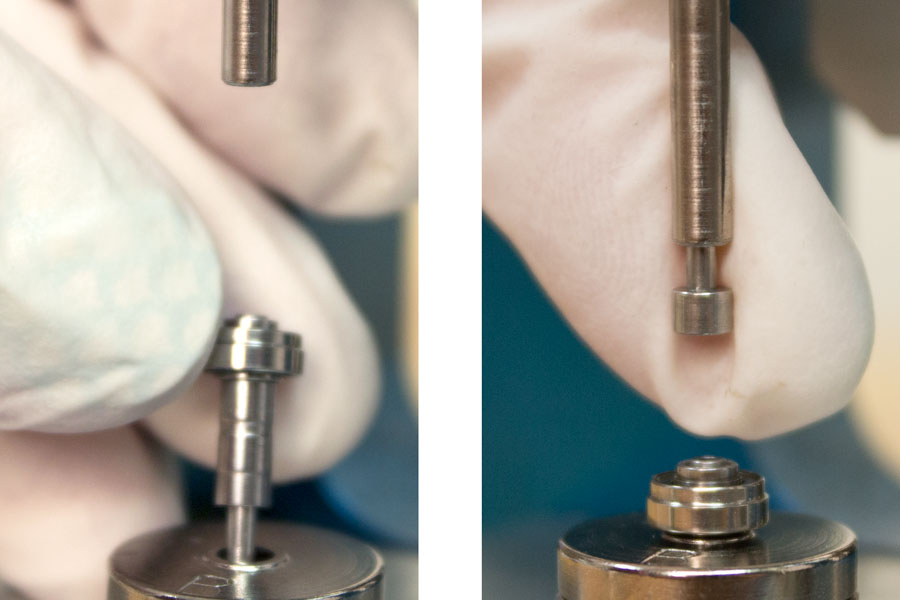
STEP 7
Feed the blank bur up into the spindle ram on the left once more and hold in place. Slowly pull the handle down until the rear bearing meets Insert B. Make sure everything is aligned and gently press the rear bearing onto the spindle. You will feel the bearing come to a stop because the spindle is stepped in the center. DO NOT FORCE PAST THIS POINT WHEN YOU MEET RESISTANCE! If the end of the spindle is not directly over the hole in Insert B then the bearing will stop prematurely and the button on the end will not stick out far enough to release the bur when you’re done, so it is important to be sure that your alignment is correct.
STEP 8
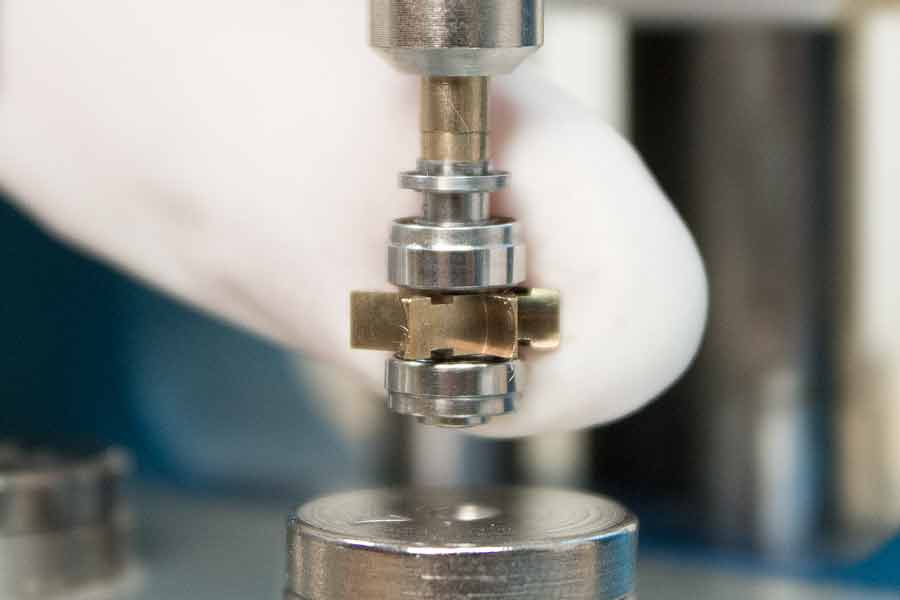
Locate your impeller and pick up your spindle that you just pressed the rear bearing onto. Hold the spindle so the bur points up and drop the impeller over the bur with the blades cupping to the RIGHT. Feed the impeller up into the right bearing ram above Insert 7 and repeat the pressing procedure until the impeller comes to a stop.
If the impeller is riding loosely on the spindle contact ProScore for replacement.
STEP 9
Locate the front bearing and drop it over the bur. The black side of the bearing should face down towards the impeller. Verify alignment. Repeat the pressing procedure on Insert 7. If the front bearing is riding loosely on the spindle use EZ Tight to hold it on.
STEP 10
Locate the slinger and drop it over the bur so flat, smooth side is facing the front bearing. Repeat the pressing procedurem on Insert 7 but before applying any pressure it is a good idea to slowly rotate the impeller while pressing to ensure the slinger goes on straight. If the slinger is crooked at all when you begin to press on it damage will occur. If slinger is riding loosely on the spindle use EZ Tight to hold it on.
STEP 11
Hold the handpiece so the head points upwards and install the turbine and head cap. Check the bur for resistance as you tighten the head cap. If you notice any resistance, remove the turbine and re-install. If problem persists, contact ProScore Tech Support.